> ## Documentation Index
> Fetch the complete documentation index at: https://docs.instapods.com/llms.txt
> Use this file to discover all available pages before exploring further.
# Deploy a Lovable app
> Connect a Lovable project to GitHub, point a pod at the repo, and auto-deploy your full-stack app to a real Linux server on a flat monthly price.
Lovable builds the app; InstaPods runs it. The flow is three steps: connect your Lovable project to GitHub, point a pod at the repo, and let auto-deploy take over. Every change you make in Lovable pushes to GitHub, and InstaPods rebuilds and redeploys within a minute - on a real Linux server with HTTPS, SSH access, an optional managed database, and a flat monthly price instead of usage-metered hosting.
Lovable now meters both **building** and **running** your app out of one credit balance, including a "run credits" category that bills your deployed app's database, storage, and network usage continuously. If that is what pushed you here, you can also stop building inside Lovable and [build with a coding agent in your browser](/guides/ai-builder) on your own Claude or Codex subscription. The full breakdown is in [Lovable run credits explained (and the fix)](https://instapods.com/blog/lovable-run-credits/). This guide covers the simpler case: hosting a Lovable export.
## What you need
* A Lovable project (any plan, including free).
* A GitHub account - Lovable pushes your source here, and InstaPods deploys from it.
* An InstaPods account with a payment method on file. Your first card add grants a one-time \$10 credit.
## Deploy in three steps
In your Lovable project, click the **GitHub** icon in the top bar and connect your GitHub account, then transfer the project. Lovable creates a private repo with all your source and auto-commits to it on every change from now on.
This is free and needs no paid Lovable or GitHub plan.
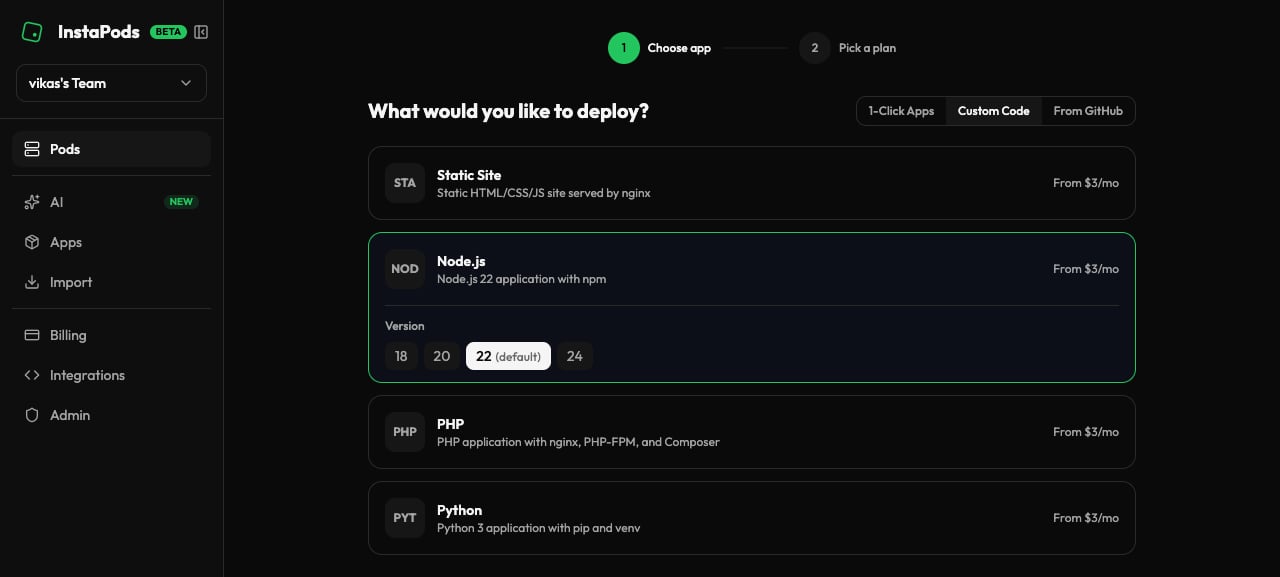
At [app.instapods.com](https://app.instapods.com), click **New Pod**:
* **Preset:** **Node.js** - Lovable apps are Vite + React on Node under the hood.
* **Plan:** **Launch ($3/mo)** handles most Lovable apps. Choose **Build ($7/mo)** if you want a database in the same pod or your build needs more memory.
* **Region:** pick the closest (EU and US available).
* **Name:** becomes the pod's subdomain.
The pod launches in seconds - no provisioning wait.
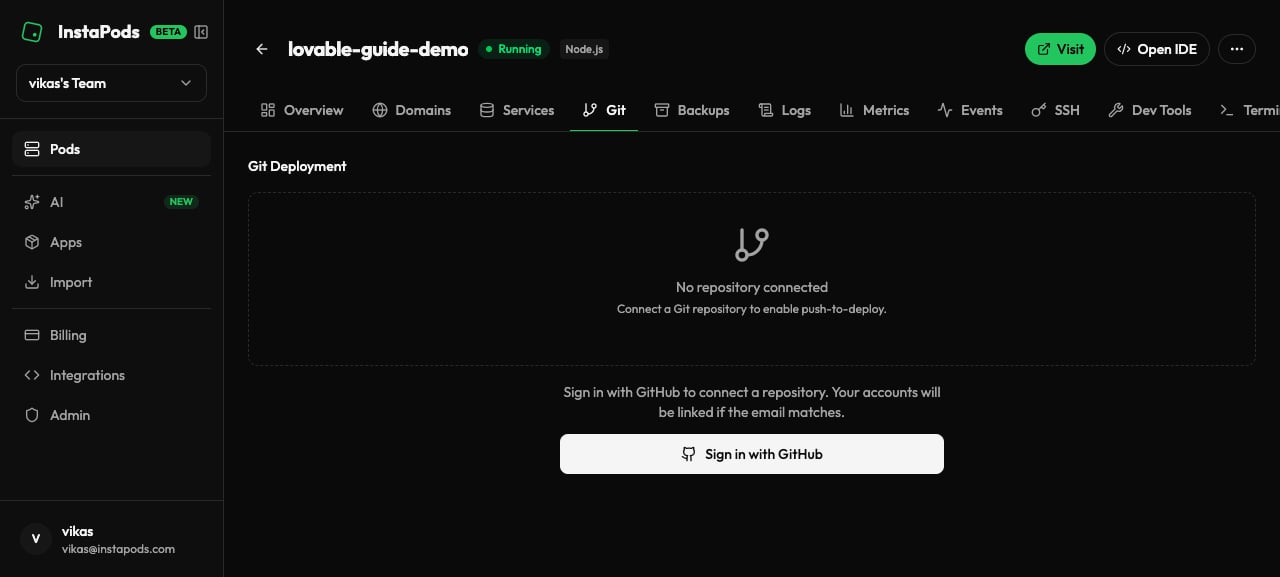
 In the pod's **Git** tab, click **Connect GitHub Repository**, install the InstaPods GitHub App (one-time per account), select the repo Lovable created, and click **Deploy**.
InstaPods pulls the code, runs the install and build it auto-detects for a Vite app, and starts the server. Your app goes live at `https://..instapods.app` with HTTPS auto-issued.
In the pod's **Git** tab, click **Connect GitHub Repository**, install the InstaPods GitHub App (one-time per account), select the repo Lovable created, and click **Deploy**.
InstaPods pulls the code, runs the install and build it auto-detects for a Vite app, and starts the server. Your app goes live at `https://..instapods.app` with HTTPS auto-issued.
 Prefer the terminal? One command does the same thing: `instapods git connect my-app --repo https://github.com/you/your-lovable-repo --deploy`. See [Git deployment](/guides/git-deployment).
## Auto-deploy on every change
After the one-time setup you never touch deployment again. InstaPods watches the repo through the GitHub App webhook, so the loop is:
1. You make changes in Lovable.
2. Lovable commits to GitHub.
3. InstaPods detects the push, pulls, rebuilds, and redeploys - your live site reflects the change in about 30-60 seconds.
If a deploy fails (a build error or a missing env var), InstaPods keeps the previous version running and surfaces the failure in the dashboard, so a bad commit never takes your site down. You can also [roll back](/guides/git-deployment#rollback) to any earlier deploy instantly.
## Environment variables
Lovable's preview environment injects keys for Supabase, OpenAI, and other services; production needs them set on the pod. Set them from the CLI and reload:
```bash theme={null}
instapods env set my-app VITE_SUPABASE_URL=https://xyz.supabase.co VITE_SUPABASE_ANON_KEY=ey...
instapods pods reload my-app
```
Vite only exposes variables prefixed with `VITE_` to client-side code. If your Supabase calls work in Lovable's preview but fail in production, you are almost always missing a `VITE_`-prefixed variable. Copy the exact names from your Lovable project's environment, prefix and all.
See [Environment variables](/guides/environment-variables) for the full reference.
## Add a database
If your Lovable app already uses Supabase, keep it - just point the app at your Supabase URL and key via env vars (above).
To run everything in one pod instead, add a managed database from the pod's **Services** tab - **PostgreSQL**, **MySQL**, or **Redis**. Credentials are auto-generated and exposed to your app, with no per-database billing on top of the pod's flat price. See [Services](/services/overview).
## Custom domain
Map any domain you own to the pod with a single CNAME and SSL is auto-issued - no certbot, no DNS challenges. Multiple domains per pod are supported. See [Custom domains](/dashboard/custom-domains).
## Common issues
Lovable apps with heavy dependencies (chart libraries, large icon sets, complex UI kits) can exhaust the Launch plan's build memory. Move the pod to the **Build plan (\$7/mo)** for more build RAM - the running app is usually fine on Launch afterward.
Set a custom build command that relaxes peer-dep resolution, then redeploy:
```bash theme={null}
instapods git connect my-app \
--repo https://github.com/you/your-lovable-repo \
--build-cmd "npm install --legacy-peer-deps && npm run build"
```
InstaPods auto-detects the port your app listens on, but if your server hardcodes one (Lovable's local dev defaults to `8080`), read it from the environment instead so the orchestrator can route to it:
```javascript theme={null}
const port = process.env.PORT || 8080;
```
This is an environment-variable problem, not a code one - see [Environment variables](#environment-variables) above. Check the pod's variables against what Lovable's preview had, including the `VITE_` prefix.
## Next steps
Skip Lovable's credits entirely and build on your own Claude or Codex subscription.
Branch settings, build commands, deploy history, and rollback.
Deploy a Bolt, v0, Claude, or ChatGPT export without a repo.
Configure Supabase keys, API keys, and secrets per pod.
Prefer the terminal? One command does the same thing: `instapods git connect my-app --repo https://github.com/you/your-lovable-repo --deploy`. See [Git deployment](/guides/git-deployment).
## Auto-deploy on every change
After the one-time setup you never touch deployment again. InstaPods watches the repo through the GitHub App webhook, so the loop is:
1. You make changes in Lovable.
2. Lovable commits to GitHub.
3. InstaPods detects the push, pulls, rebuilds, and redeploys - your live site reflects the change in about 30-60 seconds.
If a deploy fails (a build error or a missing env var), InstaPods keeps the previous version running and surfaces the failure in the dashboard, so a bad commit never takes your site down. You can also [roll back](/guides/git-deployment#rollback) to any earlier deploy instantly.
## Environment variables
Lovable's preview environment injects keys for Supabase, OpenAI, and other services; production needs them set on the pod. Set them from the CLI and reload:
```bash theme={null}
instapods env set my-app VITE_SUPABASE_URL=https://xyz.supabase.co VITE_SUPABASE_ANON_KEY=ey...
instapods pods reload my-app
```
Vite only exposes variables prefixed with `VITE_` to client-side code. If your Supabase calls work in Lovable's preview but fail in production, you are almost always missing a `VITE_`-prefixed variable. Copy the exact names from your Lovable project's environment, prefix and all.
See [Environment variables](/guides/environment-variables) for the full reference.
## Add a database
If your Lovable app already uses Supabase, keep it - just point the app at your Supabase URL and key via env vars (above).
To run everything in one pod instead, add a managed database from the pod's **Services** tab - **PostgreSQL**, **MySQL**, or **Redis**. Credentials are auto-generated and exposed to your app, with no per-database billing on top of the pod's flat price. See [Services](/services/overview).
## Custom domain
Map any domain you own to the pod with a single CNAME and SSL is auto-issued - no certbot, no DNS challenges. Multiple domains per pod are supported. See [Custom domains](/dashboard/custom-domains).
## Common issues
Lovable apps with heavy dependencies (chart libraries, large icon sets, complex UI kits) can exhaust the Launch plan's build memory. Move the pod to the **Build plan (\$7/mo)** for more build RAM - the running app is usually fine on Launch afterward.
Set a custom build command that relaxes peer-dep resolution, then redeploy:
```bash theme={null}
instapods git connect my-app \
--repo https://github.com/you/your-lovable-repo \
--build-cmd "npm install --legacy-peer-deps && npm run build"
```
InstaPods auto-detects the port your app listens on, but if your server hardcodes one (Lovable's local dev defaults to `8080`), read it from the environment instead so the orchestrator can route to it:
```javascript theme={null}
const port = process.env.PORT || 8080;
```
This is an environment-variable problem, not a code one - see [Environment variables](#environment-variables) above. Check the pod's variables against what Lovable's preview had, including the `VITE_` prefix.
## Next steps
Skip Lovable's credits entirely and build on your own Claude or Codex subscription.
Branch settings, build commands, deploy history, and rollback.
Deploy a Bolt, v0, Claude, or ChatGPT export without a repo.
Configure Supabase keys, API keys, and secrets per pod.