Lovable now meters both building and running your app out of one credit balance, including a “run credits” category that bills your deployed app’s database, storage, and network usage continuously. If that is what pushed you here, you can also stop building inside Lovable and build with a coding agent in your browser on your own Claude or Codex subscription. The full breakdown is in Lovable run credits explained (and the fix). This guide covers the simpler case: hosting a Lovable export.
What you need
- A Lovable project (any plan, including free).
- A GitHub account - Lovable pushes your source here, and InstaPods deploys from it.
- An InstaPods account with a payment method on file. Your first card add grants a one-time $10 credit.
Deploy in three steps
Connect Lovable to GitHub
In your Lovable project, click the GitHub icon in the top bar and connect your GitHub account, then transfer the project. Lovable creates a private repo with all your source and auto-commits to it on every change from now on.This is free and needs no paid Lovable or GitHub plan.
Create a Node.js pod
At app.instapods.com, click New Pod: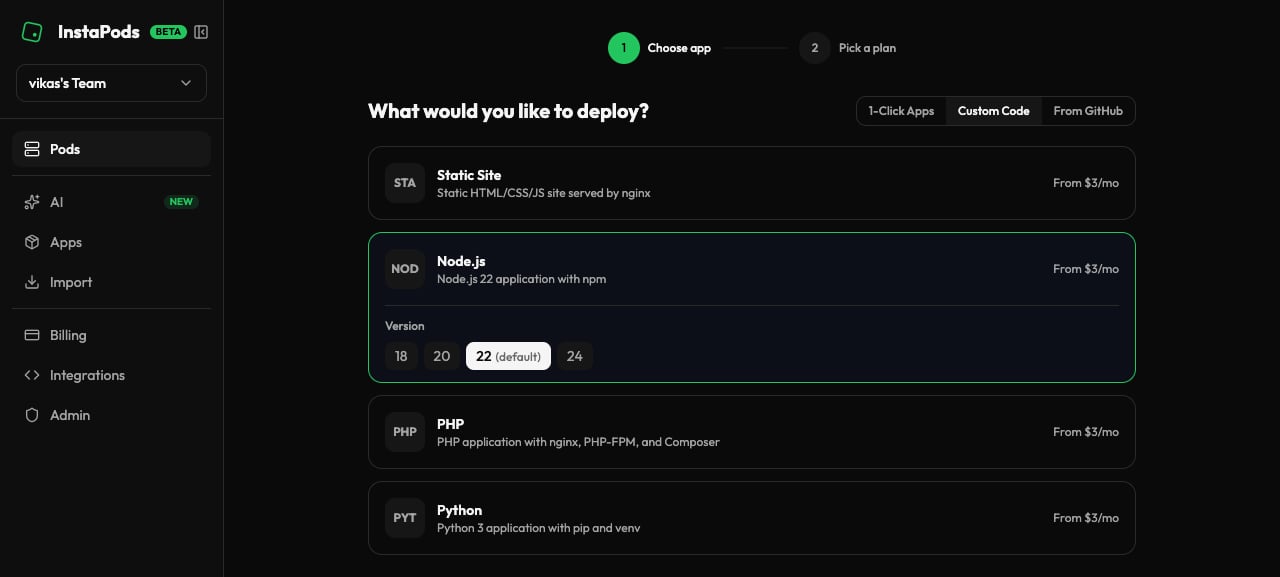
- Preset: Node.js - Lovable apps are Vite + React on Node under the hood.
- Plan: Launch (7/mo) if you want a database in the same pod or your build needs more memory.
- Region: pick the closest (EU and US available).
- Name: becomes the pod’s subdomain.
Connect the repo and deploy
In the pod’s Git tab, click Connect GitHub Repository, install the InstaPods GitHub App (one-time per account), select the repo Lovable created, and click Deploy.InstaPods pulls the code, runs the install and build it auto-detects for a Vite app, and starts the server. Your app goes live at 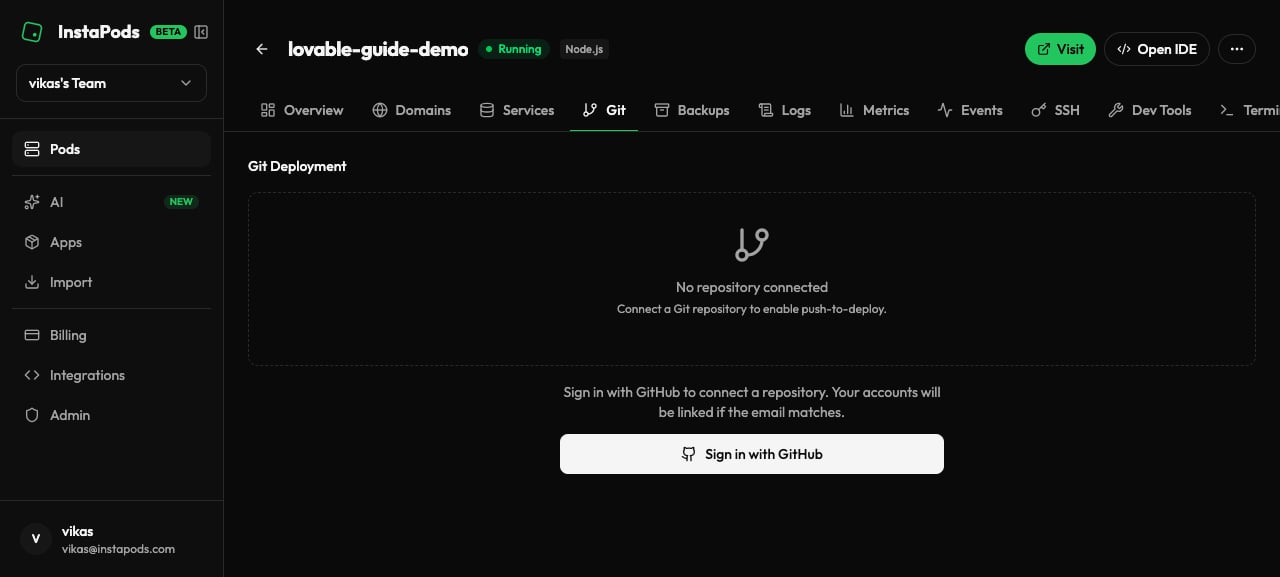
https://<pod-name>.<region>.instapods.app with HTTPS auto-issued.Auto-deploy on every change
After the one-time setup you never touch deployment again. InstaPods watches the repo through the GitHub App webhook, so the loop is:- You make changes in Lovable.
- Lovable commits to GitHub.
- InstaPods detects the push, pulls, rebuilds, and redeploys - your live site reflects the change in about 30-60 seconds.
Environment variables
Lovable’s preview environment injects keys for Supabase, OpenAI, and other services; production needs them set on the pod. Set them from the CLI and reload:Add a database
If your Lovable app already uses Supabase, keep it - just point the app at your Supabase URL and key via env vars (above). To run everything in one pod instead, add a managed database from the pod’s Services tab - PostgreSQL, MySQL, or Redis. Credentials are auto-generated and exposed to your app, with no per-database billing on top of the pod’s flat price. See Services.Custom domain
Map any domain you own to the pod with a single CNAME and SSL is auto-issued - no certbot, no DNS challenges. Multiple domains per pod are supported. See Custom domains.Common issues
Build runs out of memory
Build runs out of memory
Lovable apps with heavy dependencies (chart libraries, large icon sets, complex UI kits) can exhaust the Launch plan’s build memory. Move the pod to the Build plan ($7/mo) for more build RAM - the running app is usually fine on Launch afterward.
npm install fails on peer-dependency conflicts
npm install fails on peer-dependency conflicts
Set a custom build command that relaxes peer-dep resolution, then redeploy:
App is up but the URL shows a 502
App is up but the URL shows a 502
InstaPods auto-detects the port your app listens on, but if your server hardcodes one (Lovable’s local dev defaults to
8080), read it from the environment instead so the orchestrator can route to it:Supabase calls fail only in production
Supabase calls fail only in production
This is an environment-variable problem, not a code one - see Environment variables above. Check the pod’s variables against what Lovable’s preview had, including the
VITE_ prefix.Next steps
Build with AI in your browser
Skip Lovable’s credits entirely and build on your own Claude or Codex subscription.
Git deployment
Branch settings, build commands, deploy history, and rollback.
Import from AI builders
Deploy a Bolt, v0, Claude, or ChatGPT export without a repo.
Environment variables
Configure Supabase keys, API keys, and secrets per pod.